DIY Force Sensing Joysticks Are A Cheap Way To Go

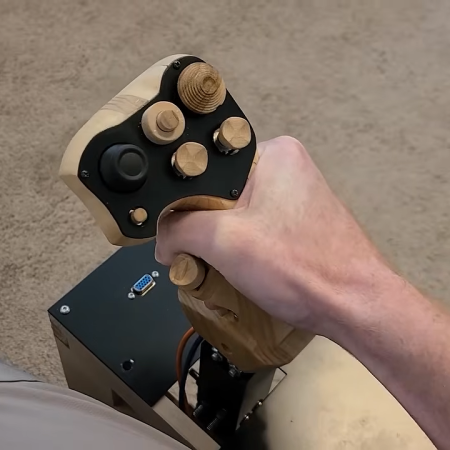
Traditional joysticks typically use potentiometers or hall effect sensors to determine the displacement of the stick itself when moved by the operator. Force-sensing joysticks are considered more desirable for certain purposes like side-stick flight simulators, because they measure the force applied instead, as per the name. They can be expensive to buy off-the-shelf, but you can build a cheap set on your own if you know what you’re doing, as [tekasza] demonstrates.

The build that [tekasza] put together is based around the Teensy 4.0 microcontroller. It’s set up to read a series of load cells that determine the force applied to the stick in the X and Y axes. The cells are wired up to HX711 load cell amplifiers so they can be easily read by the microcontroller. The Teensy does the work to take the load cell readings and convert them into axis outputs for a USB HID game controller, allowing the stick to be used with just about any game or simulator on the market. [tekasza] has the stick integrated with pedals as well as a whole bunch of buttons and switches to control other simulator features, built up into a full seated sim setup.

If you’ve ever wanted to use a force-sensitive stick like modern fighter pilots do, this build could be very relevant to your interests. We’ve also seen plenty of other great sim hardware builds in recent years, too.

Continue reading “DIY Force Sensing Joysticks Are A Cheap Way To Go” →
Slim Type For Small Screens, With PixelFonts

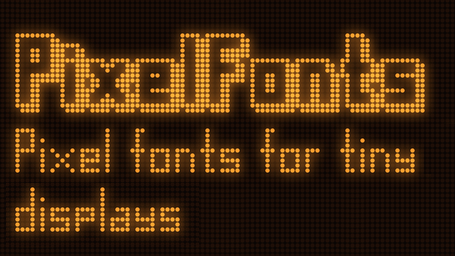
Small displays are affordable and easy to use, but their size can present a challenge. To help address this, [mcer12] created PixelFonts, a family of condensed fonts designed specifically for low-resolution displays, making sure every line holds as much text as it can fit.

PixelFonts works alongside either the AdafruitGFX or U8g2 libraries; one writes to the display using the common syntax of the chosen library, and the font itself comes from PixelFonts. Text can be displayed in regular and 3D shadowed versions, as well as in a wide variety of heights and weights. There’s support for accented letters, albeit only in lowercase due to space constraints. Want to make some changes? Every font comes with a BDF file to make alterations as widely accessible as possible.

Making the most of every pixel is important with small displays, but there’s more than one way to do so. For example, when it comes to color LCDs, subpixel rendering can improve legibility of small fonts; another way to get the most out of limited display sizes.

Two-Component H-shifter For Racing Sims

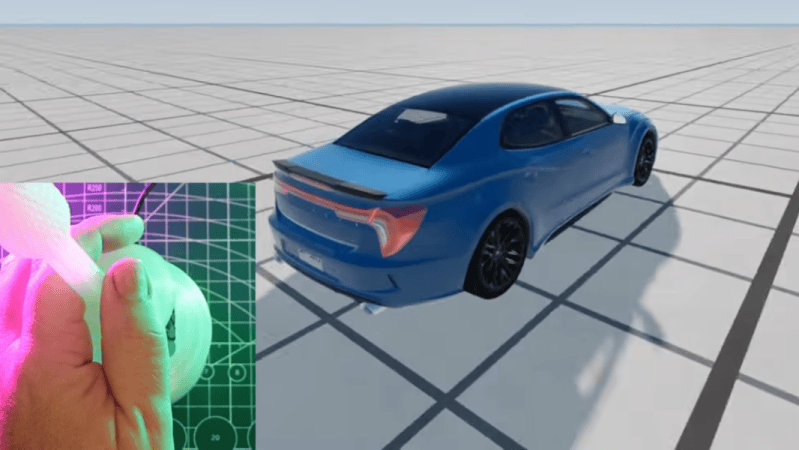
Flying and driving simulators can go as far as money will take you, and at some point it might end up being cheaper to buy a plane or race car than to keep adding capabilities to some of the sim rigs we’ve seen. But it can also be a fairly affordable hobby as well, with entry-level components being within reach for many. The price can drop precipitously from there too, provided some parts can be sourced and a 3D printer is made available, and [Jason] is demonstrating one of the lowest-cost H-shifters we’ve seen which only uses two parts at its core.

The two components only cover the electronics for the build, but this gets almost everything needed for the shifter squared away. A joystick like those found inside many game controllers is paired with an Arduino Pro Micro, with a very straightforward wiring configuration between them. These components are paired with a prototype 3D printed case and shift knob which provides the H pattern of choice. From there it’s as simple as uploading some readily-available firmware, which [Jason] also demonstrates, and which has many options for various configurations of shifters.

Although this was just a prototype, it shows was just a few off-the-shelf components and a 3D printer can provide to an affordable driving sim setup. Even then a 3D printer is not always necessary, like this three-pedal setup using extruded aluminum frame as a base. From there, all kinds of other features can be added like force feedback on the steering wheel.

Continue reading “Two-Component H-shifter For Racing Sims” →

Conveyor Belt GBoard Brings The Keys To You

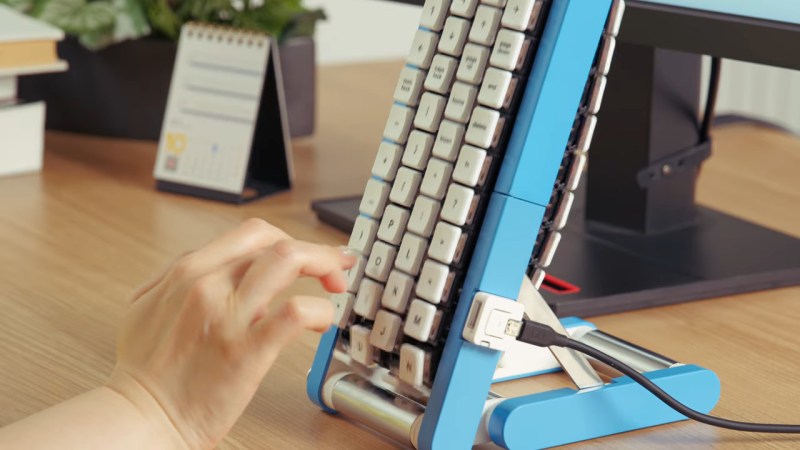
It must be April in October again, because Google Japan has a new, hilariously impractical reimagining of the keyboard: a conveyor belt. This time it’s on GitHub with firmware, STLs, and a full build guide if you, too, want to wait a full cycle to get the ‘backspace’ key whenever you make a typo, or to write such fun words as “ooid” or “princesship”.

You can watch it in action in the video embedded below, but just the photo probably gives you the idea: the four staggered rows of keys are each 3D-printed chains holding mechanical key switches, driven from a motor in the base. Each row also has a flexible PCB to keep everything wired together, though it’s unclear how those electrical impulses from the key presses get off the conveyor belt and into your computer. That part of the build guide is “TBD” and the source code doesn’t appear to be complete.

Those details may be forthcoming, or it might never be revealed because this is obviously a joke, but now that they’ve gone to the effort of providing STLs, we’re now invested in figuring out how to actually make it work. A BLE-equipped microcontroller in each belt? RFID tags on each key, with readers in the base? SMD LEDs on the flex PCB that flash out the ASCII code of each pressed key as they whiz past a sensor? In theory, any of those should work, but which should we use? You decide!

We like Google Japan and their weird keyboards, and we have to say that compared to the hat from a few years ago, this one is almost practical, though the rotary-phone one wins on style points. In some ways, it occurs to us that this is the exact inverse of the chain printers of yesteryear.

Thanks to [CityZen] for the tip! If October for you is more “spooky” than “silly”, we still want to know about it. Or if you build any of the Gboards. Either way, let us know on the tips line what you’re up to.

Continue reading “Conveyor Belt GBoard Brings The Keys To You” →

A Modular Macro Keypad

The introduction of the ATmega32U4 microcontroller, with its integrated USB controller, made a lot of hardware tasks much simpler than they were before. One of the arenas it revolutionized was custom keyboards, making it much easier to build not only standard mechanical keyboards, but keyboards of all kinds of shapes and layouts and custom macro keyboards as well. This trend has continued on for the better part of the past decade with other microcontrollers beyond the 32U4 now available as well, but this modular macro keypad takes it to a new level by keeping that simplicity but also keeping costs down.

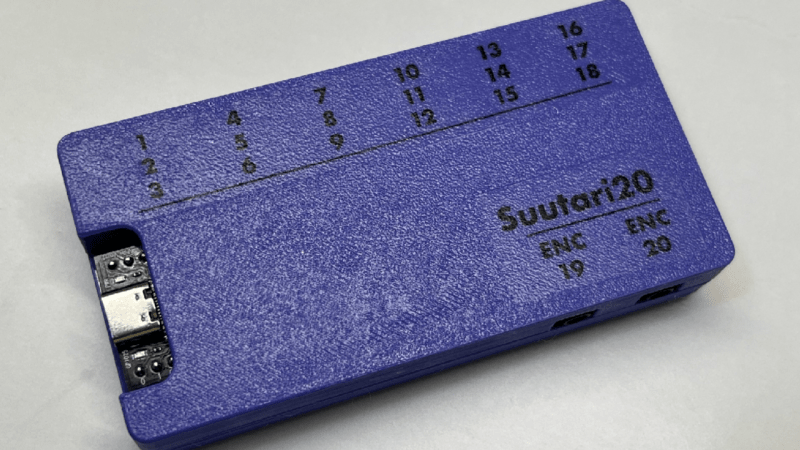
The suutari20, as it is called by its creator [Squalius] is able to achieve these aims by using 3.5 mm jacks commonly found in audio equipment. Each jack can support up to three keys, with the hub ultimately able to support 18 different keys. Those can include analog devices as well, such as volume knobs or jog controllers. The macro pad is powered by an RP2040 microcontroller from a Raspberry Pi Pico and uses QMK firmware, so those already familiar with custom keyboard programming will have no problem getting started.

From there, all that’s needed is a case, in this example a 3D printed one, and the commodity audio hardware to plug everything in to. It enables whatever functions can be thought of in a macro pad, and although the design focuses on simplicity and cost, this macro pad takes the concept to the extreme with modular keys that each have their own microcontroller built-in.

Continue reading “A Modular Macro Keypad” →

Writing An ESP32 Bluetooth Printer Driver In Two Acts

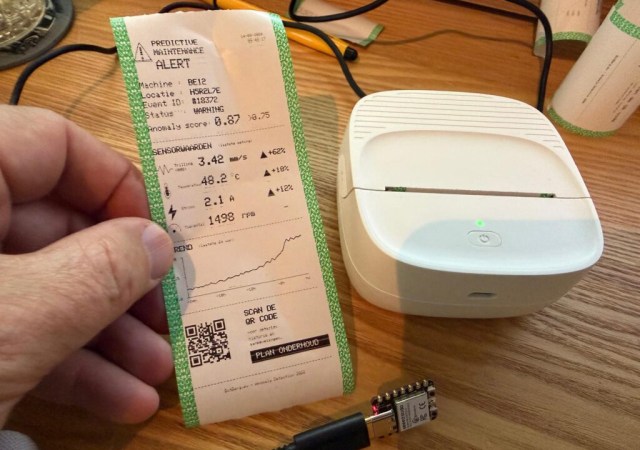
[Bas BotBerg] wanted to use a portable Bluetooth thermal printer to run off reports on sensor data collected by an ESP32-C3 microcontroller. But as is so often the case these days, the only official way to interface with the printer was through a proprietary smartphone application provided by the manufacturer. With no documentation on how the thing works, he set out to reverse engineer the printer’s communications protocol so he could control it from the MCU — but the route he took to get there was a bit different than what we usually see, and is an excellent case study for those who might have similar projects in mind.

The standard procedure for something like this, if it can be called that, is to use Android’s built-in debugging capability to log Bluetooth communications while running the manufacturer’s application. The resulting file can be fed into Wireshark, and with patience and some educated guesses, you can usually work out the various commands and values that get passed to the hardware.

But in this case, [Bas BotBerg] ignored the manufacturer’s software and instead used an application that can query a device and list its Bluetooth Low Energy services and characteristics. Specifically, he looks for services that are marked as writable, and starts pushing data into them to see how the printer responds. For this he uses Python with the Bleak library, as it allows him to rapidly iterate and adapt his code. After a bit of poking and experimentation, he finds the proper incantation to get the printer’s motor to kick on and advance the paper — a critical first milestone that tells him he’s on the right path.

Once [Bas BotBerg] mapped out what data needed to be sent to what endpoints to operate the printer in Python, it was a relatively straightforward process to send those same payloads using C++ code on the ESP32. For extra style points he also brought in the Adafruit GFX library so he could produce icons and more easily format the output of the printer.

It doesn’t look like [Bas BotBerg] has released the code in this case (perhaps if we all ask nicely), but we’ve seen similar efforts to bring open source drivers to these cheap Bluetooth printers for the good of the community.

If It’s Electronic Paper, Why Not Print To It?

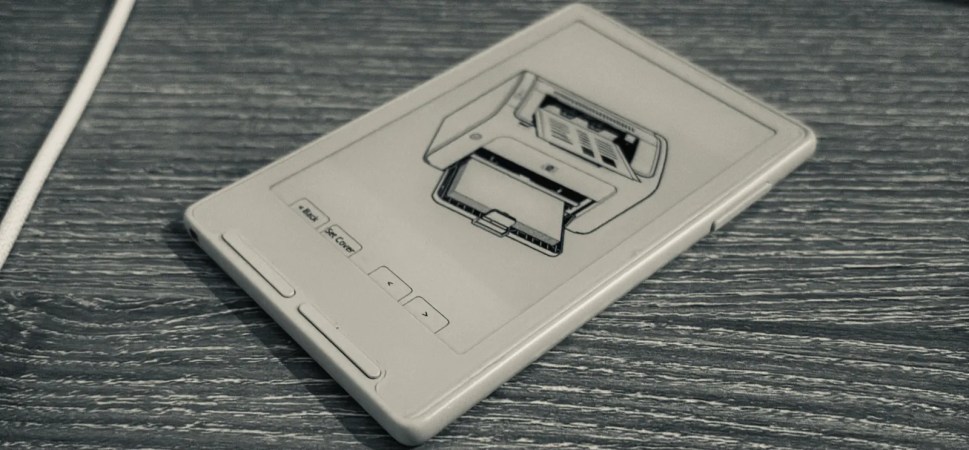
E-ink is supposed to be the electronic version of dead-tree paper, but there’s one enormous difference: how you get your images and text onto it. For paper, you print on it. E-ink? Well, it depends on what it’s hooked up to. If it’s an ESP32C3-based Xteink X4 and X3, then you can just print to that, too, thanks to [Nishant Joshi]’s fork of the popular CrossPoint firmware.

The fork implements the Internet Printer Protocol, IPP, on the ESP32-C3. It makes loading documents a breeze: select the printer in your operating system, and press print. To the computer, the reader advertises itself as a printer that provides monochrome, single-sided output at 300 DPI on A5 paper, and accepts Apple raster and PWG raster formats. Of course these raster images are enormous compared to the paltry RAM available on the microcontroller, so pixels are received and written row-by-row — both to the screen directly, and to the SD card for later perusal. That makes a folder on the SD card the equivalent of a printer’s output tray.

This interface is amazing in its simplicity, and we’d love to see it in other E-ink devices. It reminds us somehow of AlphaSmart word processors — which are still relevant today in large part because their ‘file transfer’ mechanism is to pretend to be a USB keyboard and type the document onto your computer. As long as IPP is available, so too will you be able to get documents onto this e-reader.